At Rivtec LLC, we know that designing metal parts for laser cutting can be tricky, especially when it comes to tolerances—the slight variations that naturally occur during the cutting process. If you’ve ever had a part that didn’t fit quite right, chances are tolerance was the issue. This guide will help you understand how to design your parts properly to avoid surprises and make sure everything fits perfectly.
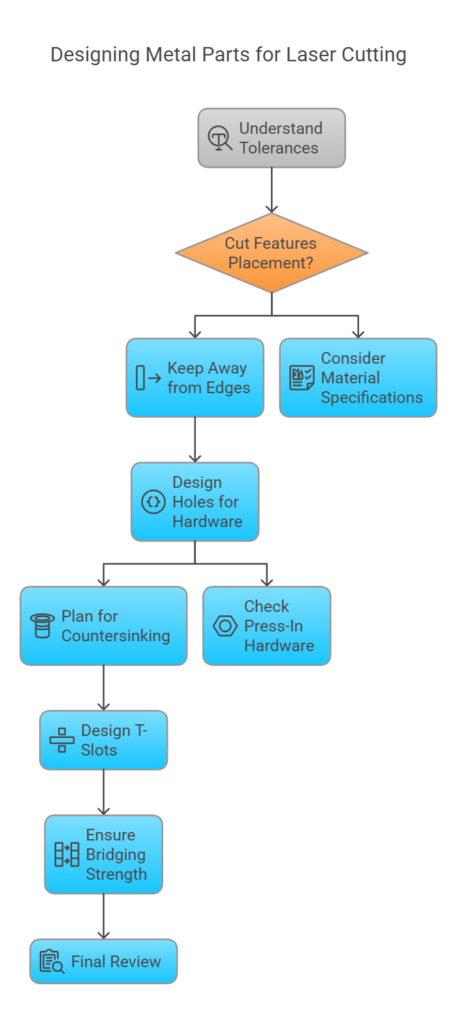
Why Tolerances Matter in Laser Cutting
Think of tolerances like margin-of-error. Even with the most precise laser cutters, there will always be tiny variations in cut size. Our standard tolerance is ±0.005 inches, meaning a cut can be slightly bigger or smaller than expected. Designing with this in mind will save you time and money by ensuring parts fit correctly the first time.
Keeping Cut Features Away from the Edge
A common mistake in design is placing holes, slots, or cutouts too close to the edge. While it might seem like a good way to save space, it can weaken your part or even make it impossible to cut accurately.
Best Practices:
- Holes: Keep them at least 1X their diameter away from the edge.
- Slots: Keep them at least 1.5X their width from edges or other cutouts.
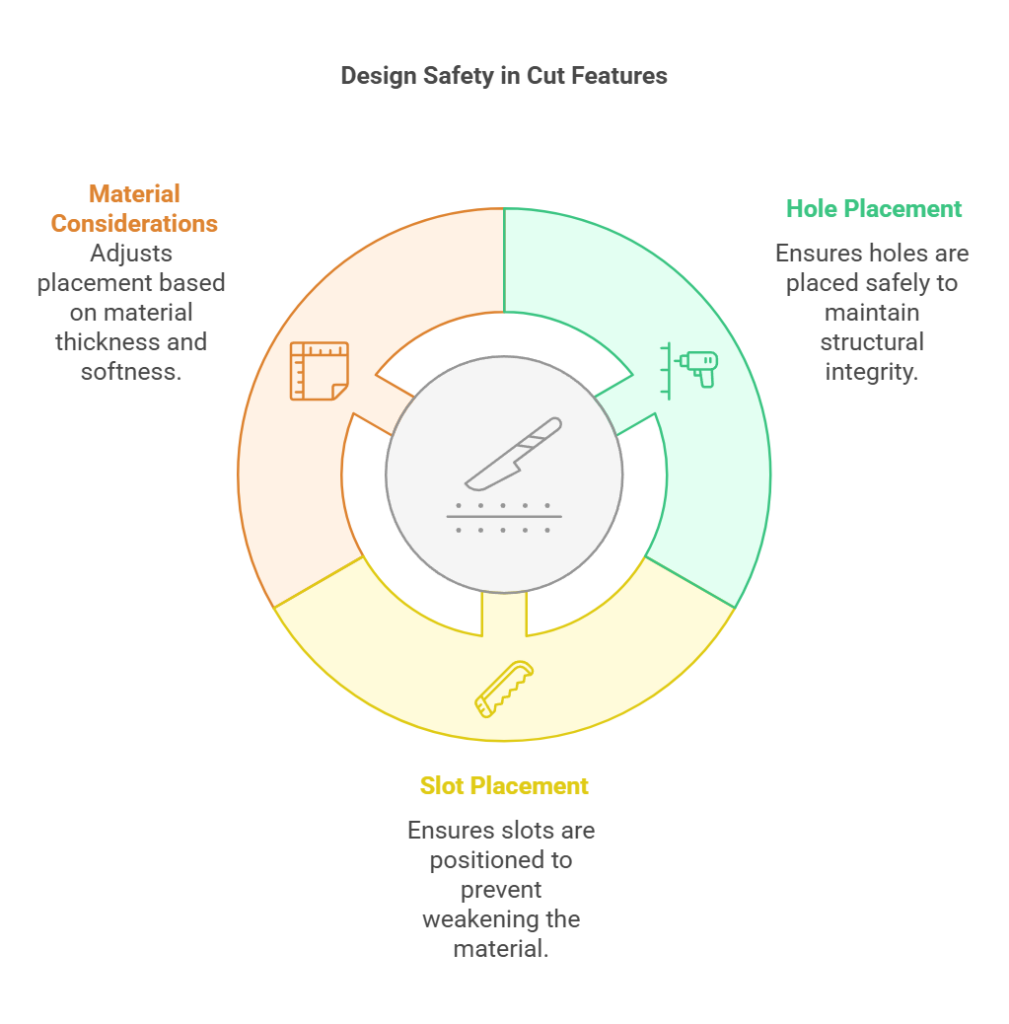
Thicker or softer materials may require even more space, so always check the material specifications.
How to Design Holes for Screws & Hardware
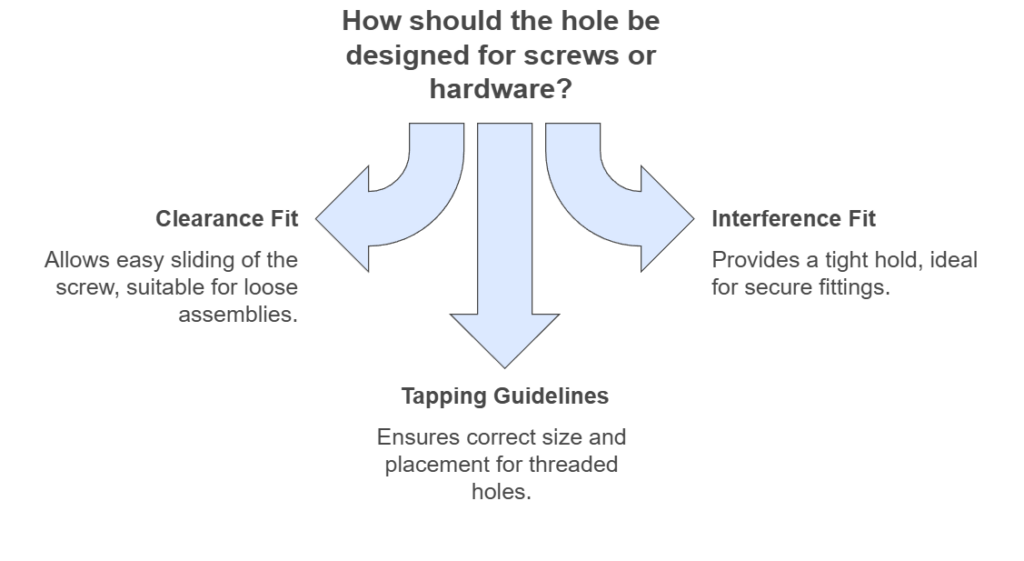
When designing holes, it’s important to think about how the screw or bolt will fit:
- Clearance Fit: The screw slides through easily.
- Interference Fit: The screw needs to be forced in, holding it tightly in place.
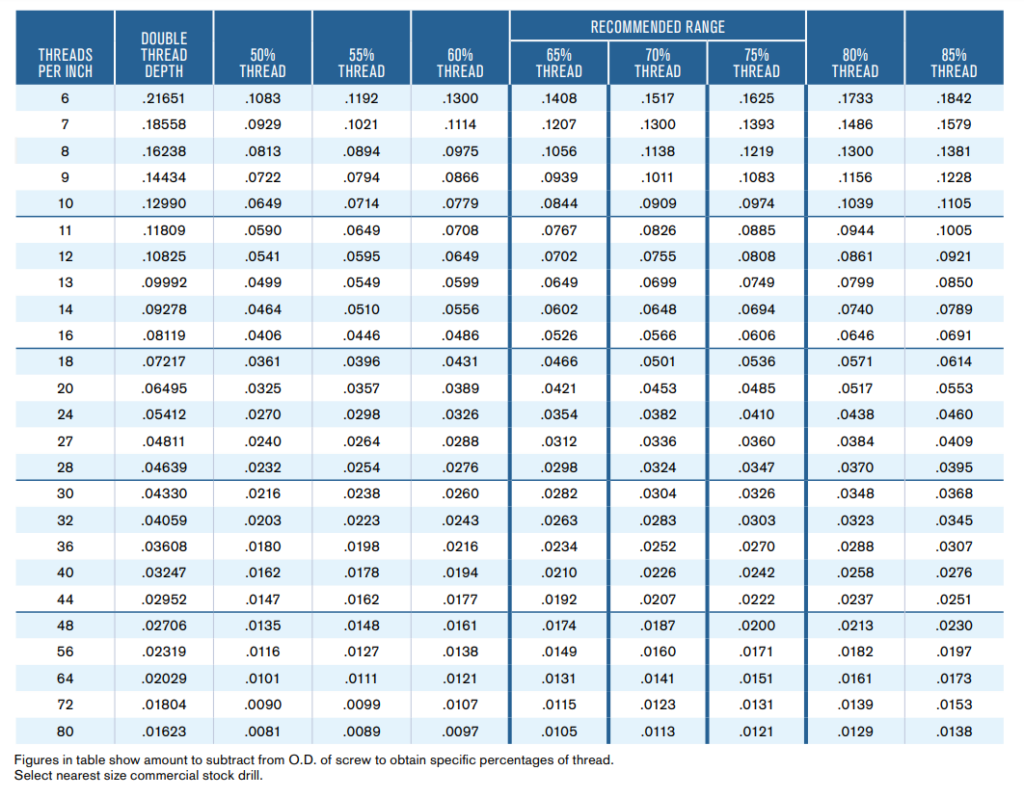
If you plan to tap a hole (add threads for a screw to screw into):
- Use our tapping guidelines to make sure the hole size is correct.
- Keep tapped holes at least half their diameter + minimum hole-to-edge distance away from the edge.
Countersinking & Press-In Hardware
- Countersinking: If you need a screw to sit flush in the metal, the hole needs to be large enough to accommodate the head. Make sure there’s enough material around the hole so it doesn’t weaken the part.
- Press-in Hardware: These fasteners require specific hole sizes and spacing. Always check our hardware catalog for the right hole-to-edge distances.
T-Slot Design for Easy Fastening
T-slots are a popular design feature that allow nuts to slide into a part and lock in place when tightened.
Design Tips:
- Make the slot 0.01 inches wider and taller than the nut’s smallest dimension to ensure a smooth fit.
- This extra space prevents the nut from getting stuck and ensures it holds securely when tightened.
Bridging & Pocketing: Keeping Parts Strong
Bridging refers to the distance between cut features or between a feature and the edge of a part. If this distance is too small, the part can become weak or even burn away during cutting.
Best Practices:
- Minimum width: At least 50% of the material thickness.
- Stronger design: Aim for 1X – 1.5X material thickness for better durability.
Example: If your material is 0.125 inches thick, keep bridges at least 0.0625 inches wide for strength.
Final Thoughts: Designing with Tolerance in Mind
Tolerances are a natural part of manufacturing, but with careful planning, you can make sure your parts come out precise and functional. Here’s what to remember:
- Always leave enough space between features and edges.
- Double-check hole sizes for screws, tapping, or hardware.
- Plan for cut tolerances (+/- 0.005 inches) to ensure a good fit.
Need help? Our team at Rivtec LLC is here to assist! Reach out at info@RivtecLLC.com and let’s make sure your next project is a success.